Moon Pie Phases
Do you need a simple moon phases lesson. This is it. First we discussed how the moon reflects the light of the sun and how the moon is orbiting around the earth and how the earth is orbiting the sun. Then I used a flashlight to reflect off the aluminum foil paper plate moon I had made so that the students could see how this worked. This video helped discuss the moon phases.
Next, we discussed the simple phases of the moon and shaded in eight circles to represent each phase. We also discussed the reason for the name “quarter” and related it to fractions. Here is a great website to visit about moon phases.
*Full moon
*waxing gibbous
*first quarter
*waxing crescent
*new moon
*waning crescent
*3rd quarter
*waning gibbous
Finally, I assigned students to look at the night sky each night to color in their moon calendar which I downloaded for free here. I had students watch the moon for an entire month, color, and label the phases. I told students I would have a “little something” for them if they brought their paper back completed.

A Worm Named Oreo
Leaving school one day I hear a discussion among kids on the playground. “What did you name your worm? I named mine Oreo.” The girl says she named hers Oreo because it looked like an Oreo with all the dirt on it. Paper plates seemed to work well for containing the worms for observation. You have to be careful though because the worms can wander off if you don’t watch them. I found one trying to crawl off of a student desk. I lost another one, but the custodian found it on the floor. Hey, I added excitement to his day! LOL!

This discussion came as a result of me teaching them about worms and them looking closely at the body parts of a worm. To add an element of creativity, I had students name their worm. We did this after watching the Diary of a Worm on video. I love this book for it’s imagination into the creative world.
Students are studying ecosystems, so I plan to build a worm farm of sorts in their classroom. For now, I am just holding onto the worms until we learn a little more. To build a worm farm, you need a container, dirt, old newspaper, and some vegetable scraps. Of course, you need worms. I purchased mine at Wal-mart in the sporting goods section. Until we learn more I am storing them in the refrigerator on a not too cold setting in some dirt. I have given them an old banana peel in case they need a snack. This website has some good information on worm farming. You will need a container, dirt, old newspaper, and some vegetable scraps. Until we learn more I am storing them in the refrigerator on a not too cold setting in some dirt. I have given them an old banana peel in case they need a snack. This website has some good information on worm farming if you want to build one.
The great thing about showing students worms is that I got some work out of some students who don’t normally produce work just so they got to look at a worm. I will give you more information soon about our worm farm adventures.
Entertain Your Children Outside with a Mystery!
I’ve posted before here about The Golden Angle, the mysterious 137.5 degree angle that appears in nature and, and my students’ explorations with finding it outside here and here. Recently, I was showing someone about the Golden Angle and how amazing it was in nature. This prompted me to see if I could find it in other places besides an oak tree leaf and grass. Well guess what?! I did. Taking time for a tiny nature walk collection in my yard yielded some more amazement!
With most leaves, I found that lining one side of my angletron tool up to the stem allowed the other side to hit the first vein in the leaf.
Fig tree leaf immediately below:


Shrub leaves below:

Notice how the branches separate at the 137.5 degree angle below.

Nut grass, as my mom calls it, is below. I’ve notices the regular lawn grass grows this way, too when it goes to seed.

I love intriguing math mysteries, and I hope you enjoy them, too.
Not long after I started plucking leaves out of my yard, I noticed a mathy friend of mine posted something on social media about the number 137. Strangley enough, this number is a really big deal to physicists and called the fine-structure constant! Who knew?!
Snow Lessons for January
I will be sharing with you my K-2 enrichment lessons for January’s return. All of these lessons revolve around snowmen.
In kindergarten we will discuss what imagination is and read the well loved Snowmen at Night.
After we read this, students will design their own snowman and describe what he looks like, what his favorite food is, his name, favorite games, etc. As we finish, students will share their work, and we will discuss who used imagination and originality.
In first grade we will also discuss imagination and originality. Then we will read Sneezy the Snowman.
After we read this story, I will challenge students to think of a way to create Sneezy the Snowman without using snow since he keeps having the problem of melting. Students will have to think of different spherical shapes they might use for the balls that make up a Snowman. For example, they might use basketballs, globes, beachballs, Christmas ornaments, or the like. It will be fun to se who has the most imagination with this lesson!
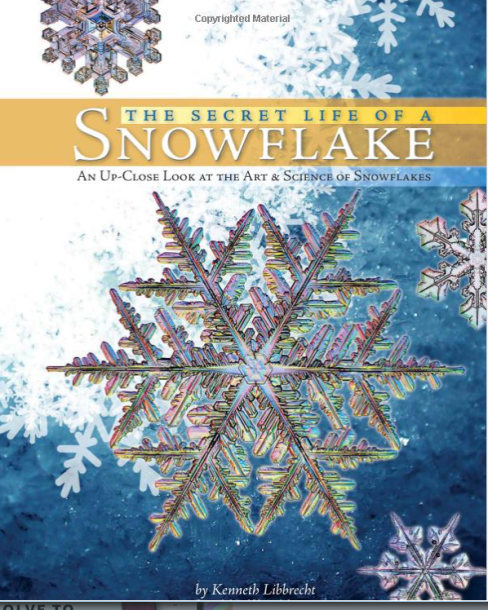
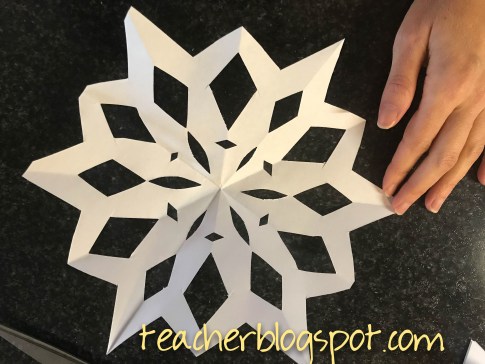
With second grade, I will recycle a lesson I have done before and love! We will create six pointed paper snowflakes after learning about snowflakes in the book below. I will link to that post here.
This year, I may change things up a bit as I use this video in lieu of the book.
Don’t forget Super Teacher Worksheets has lots of snowman resources, too, to round out any unit you may be developing!
Boost Any Unit Study by Doing This!
Are you studying electricity? Invite an electrician. You can even use the people who work for your school district? I have used people who work for the district before. They brought many interesting things for the students to look at such as the wire that goes into the wall. They had circuit breaker switches and many interesting stories. There is nothing to compare to someone who actually works in the field you are studying.
A great capstone to any unit study is to bring in a guest speaker. Right now this is easier than ever before with the ability and prevalence of Zoom. This is a great confidence builder for your children! They can learn interview skills. We discuss how to ask open ended questions. I show them the video of Katie Couric but have to translate some of her advanced vocabulary. We discuss how to ask open ended questions instead of one word answer questions. I then have students practice their interview questions on each other.
Most recently, on a whim I called the local dive shop while we were studying the ocean. Guess what?! I had someone there who actually taught dive classes gladly volunteer to speak to our students. The children were so excited to show off their paintings and creative writing pieces to the dive instructor who had gone on trips ALL over the world. She had even explored a sunken ship!
We will be studying the stock market soon. Be sure I will be inviting a stock market broker in to speak to the children. Last time we studied the stock market I had a parent come to speak to the children. Never forget the resource of your parents!
Two Things We Did to Make Studying the Ocean Fun

We studied the ocean recently and my students really enjoyed some activities I am going to share with you. We estimated and measured out the first ocean layer (600 feet) with a very long tape measure of 100 feet. After each 100 feet we made a mark with chalk so that we could see each distance. I put some children in charge of carrying chalk, yard sticks, and the measuring tape. When we weren’t on a hard surface anymore, we stuck a yardstick upright in the ground to hold our measurement mark. Measuring this ocean layer not only helped children with their understanding of measurement, they were able to relate the expanse of the sunlight layer to the size of their own small bodies.
Secondly, we built ocean layers in a bottle. The children LOVED this! There are many people who post about this activity on different websites. I will tell you how our worked. We made density predictions first. The bottom layer was the trenches. We used corn syrup here and we dyed it with red, green, and blue food coloring to make it brown. The next layer–the abyss–we used Dawn dish soap. This worked out okay since it was already blue. The midnight layer was water that we dyed blue. I’m not crazy about using water for this layer because it blended in with the soap and you couldn’t really distinguish much of a difference. At least the students knew there was another layer even though it blended. Next, the twilight layer was cooking oil. This easily worked, and I didn’t attempt to dye it since I knew the food coloring I had wouldn’t mix with oil. I kind of like that it vividly shows up as a different color though. Finally, we added the sunlight layer. This is a layer of alcohol. Make sure to get 90% isopropyl alcohol so it doesn’t mix. We added one drop of blue food coloring to a tablespoon of alcohol.
The problems and what I liked. The bottom three layers are dark and you really can’t tell the difference in them. I think it is good that we put the layers in there so students knew that there were three bottom layers. Know that it is hard to tell the difference in the bottom layers though.
Next, know that this is messy, and you will be having to wash materials. I had some small plastic cups available so children could mix the food coloring. I also had funnels available. Funnels are useful to minimize messes, and I had the children pour this over a paper plate. I had students work in partners and hold one another’s bottle while the other child held the funnel and poured. This worked well.
Originally, I thought I would have the children make the layers proportional to the size they really are in the ocean, but I realized after making a sample that it would be more reasonable for the activity to make all the layers one fourth of a cup except the top layer which was a tablespoon. I gave the children labels and had them write the name of each layer on them as you can see from the pictures. The whole activity took around 90 minutes after instructions were given. My students are well behaved, and I probably wouldn’t have done this if they hadn’t been. If you want to still do this with students who don’t follow directions well, I suggest only making the top three layers and using smaller containers. Happy “diving”!


Don’t Throw Out a Broken Clock! You Can Do This
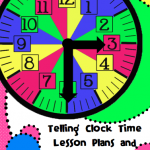
In the current school I work in, we had many broken clocks that wouldn’t keep time. When I discovered some of our smartest students couldn’t tell time, I had an idea! I thought I would use one of these old and broken clocks for a teaching tool. I took it home and broke the hard plastic off the front. Then I ruled off sections on the clock with lines and put circles around the numbers. Each number’s circle color matches the section behind it. The reason for this is to help children know that if they see the hour hand anywhere in the colored section that the hour belongs to the number with the same color. I had a little friend who was very interested in telling time.

If you like this idea for teaching children analog time, you will love the Telling Clock Time unit here! There are these ideas and more used to teach analog time.
What a Great Way to Start the Year!

This is just a quick post to share a lesson idea. I came across this book the other day, picked it up, and read it in Hobby Lobby. I thought it would make a great lesson for back to school. It celebrates students individual talents and gifts. This would be a great ice breaker activity to display the individuality of students in their “Hot Air Balloons”. Students could. build these maybe out of coffee filters OR whatever else you imagine!
