


I Want to Be Kind
I rarely leave kindergarten without a story to tell about the events that happened while I was there. The story I am about to relate is probably my favorite one from the whole year.
I taught my normal lesson, and at some point during the time, I needed children to pull out a glue stick. It rarely fails that at least one child is without a glue stick when I ask them to pull one out. When one child let me know he didn’t have a glue stick another child readily volunteered his. I spoke to the one who lent the glue stick and said, “Thank you Johnny for being kind.” Immediately after this tears erupted from close by. Why the tears, you ask? The tears were accompanied by these words. ” I wanted to be kind…I wanted to be kind.”
I love the rawness of kindergarten–raw emotion. There is no holding back as with adults or grown up children. In fact, I think most adult behaviors could be explained with a trip to kindergarten.
In all honesty, don’t we all want to be recognized for being kind? In many cases, we as adults aren’t kind because it helps someone or because it is the right thing to do. We do it because in our pride we selfishly want accolades for our kindness.
Teaching Kids to Say Thank You
Recently I pondered the idea of thank you cards. I haven’t received a thank you card for a wedding or shower in quite some time. At first I thought maybe the recipient was just being rude or thoughtless, but when I heard other ladies inquiring if I had gotten a thank you card, I wondered if this wasn’t just becoming a trend. After a short internet search, I realized that this is becoming a trend. It is not “the thing” to not receive a thank you card or a thanks for that matter.
I do my best to teach my students to say “thank you” to one another and to me. I have read the Ron Clark book to students in which he takes items back from students if they don’t say “thank you” in three seconds after receiving the item. This teaches them to be more thankful.
This month my students collectively wrote a thank you card to a guest speaker we had. I folded a 12 x 18 piece of construction paper in half. Then I divided the front into little squares so that each student could do their own artwork within the square. Before I let the students write in the square, I handed them a sticky note of the same size so that they could plan their artwork before they wrote in the construction paper square. This project turned out so beautifully.
The card SO impressed the guest speaker that I got a thank you card for the thank you card..haha! This warmed my heart during a week when I really needed some cheering up. Below I have pictured the thank you card I received from our guest speaker. In addition, at a later date, we received some coupons for all of my students to receive some free items. Hopefully this will make an impression on my students to always say “thank you”!

Two Things We Did to Make Studying the Ocean Fun

We studied the ocean recently and my students really enjoyed some activities I am going to share with you. We estimated and measured out the first ocean layer (600 feet) with a very long tape measure of 100 feet. After each 100 feet we made a mark with chalk so that we could see each distance. I put some children in charge of carrying chalk, yard sticks, and the measuring tape. When we weren’t on a hard surface anymore, we stuck a yardstick upright in the ground to hold our measurement mark. Measuring this ocean layer not only helped children with their understanding of measurement, they were able to relate the expanse of the sunlight layer to the size of their own small bodies.
Secondly, we built ocean layers in a bottle. The children LOVED this! There are many people who post about this activity on different websites. I will tell you how our worked. We made density predictions first. The bottom layer was the trenches. We used corn syrup here and we dyed it with red, green, and blue food coloring to make it brown. The next layer–the abyss–we used Dawn dish soap. This worked out okay since it was already blue. The midnight layer was water that we dyed blue. I’m not crazy about using water for this layer because it blended in with the soap and you couldn’t really distinguish much of a difference. At least the students knew there was another layer even though it blended. Next, the twilight layer was cooking oil. This easily worked, and I didn’t attempt to dye it since I knew the food coloring I had wouldn’t mix with oil. I kind of like that it vividly shows up as a different color though. Finally, we added the sunlight layer. This is a layer of alcohol. Make sure to get 90% isopropyl alcohol so it doesn’t mix. We added one drop of blue food coloring to a tablespoon of alcohol.
The problems and what I liked. The bottom three layers are dark and you really can’t tell the difference in them. I think it is good that we put the layers in there so students knew that there were three bottom layers. Know that it is hard to tell the difference in the bottom layers though.
Next, know that this is messy, and you will be having to wash materials. I had some small plastic cups available so children could mix the food coloring. I also had funnels available. Funnels are useful to minimize messes, and I had the children pour this over a paper plate. I had students work in partners and hold one another’s bottle while the other child held the funnel and poured. This worked well.
Originally, I thought I would have the children make the layers proportional to the size they really are in the ocean, but I realized after making a sample that it would be more reasonable for the activity to make all the layers one fourth of a cup except the top layer which was a tablespoon. I gave the children labels and had them write the name of each layer on them as you can see from the pictures. The whole activity took around 90 minutes after instructions were given. My students are well behaved, and I probably wouldn’t have done this if they hadn’t been. If you want to still do this with students who don’t follow directions well, I suggest only making the top three layers and using smaller containers. Happy “diving”!


5 Things I wish I Had Known as a New Teacher Part 1
1. I wish I had known not to work so hard. It took COVID for me to see that I had let my job absorb nearly my whole life. Taking a step back with the ups and downs of the 2020-2021 school year made it evident that there is more to life than work. I now have an alarm set on my phone so that I am more aware that I need to go home and take care of myself.
2. Look at the pay scale from the bottom. An old wise teacher once told me this. I wish I had done this. Now that I am at the bottom of the scale, of course I am looking at this, but as a new teacher I always looked at the top few levels. This is especially true if you don’t want to move around and work at different school districts.
3. Build up some sick leave, but once you have it built up, if your district offers no incentive, MAKE SURE YOU TAKE SOME TIME OFF FOR YOURSELF! When you are gone you will be replaced easily. For your family you are not easily replaced! Stress is the root of disease in most cases, so love yourself.
4. Every school building has a cow who wears a bell. I have worked in many schools, and most of them had a cow with a bell. The cow makes him or herself valuable. This is the person who helps the administrator out thereby escaping administrative criticism. This person carries influence. Be friendly to the cow even if you don’t like him or her.
5. Your boss has a shiny nickel–the thing that makes him or her say “WOW”. At one of my first jobs the shiny nickel was a pretty bulletin board. To my advantage, I liked making a pretty bulletin board, so I had the shiny nickel and was favored for this and several other reasons. Find out what your principal’s shiny nickel is–ask veteran teachers at your school.
10 Ways to Avoid Summer Brain Rot
- Send children outside to collect something. For example, collect, rocks, leaves, flowers, dirt samples. What similarities and differences do you see in each thing?
- Grow something that attracts butterflies such as dill and notice what happens as the caterpillars grow. Do they see any caterpillars shedding their skin as they grow?
- Go outside with a magnifying glass and look at crawling bugs. Where are they going? Are they carrying anything? Why?
- Oldie but a goodie If you have the neighborhood for it, set up a lemonade stand. Have children figure out how much they would have to charge per glass to make money.
- Learn some information above your grade level. Parents can sign their children up for Super Teacher Worksheets and either brush up on topics they need some review with or work to learn skills above their grade level.
- Look at the sky and find cloud pictures. What do chidden see? Do others see something different?
- Draw a picture of your backyard. Now draw a picture of your DREAM backyard. What would you change and why?
- For older children, buy some vinegar and baking soda. Discuss chemical reactions and the Periodic Table. Old film canisters and ziplock bags work great for a closed environment to mix the baking soda and vinegar. The pressure will build and “pop”. the kids will get instant smile with pleasure when the chemical reaction explodes. Protective eyewear would probably be best or just stand at a distance.
- Teach your dog new tricks. Make videos of these to share with your friends.
- My very favorite: Make an angletron like I discussed in the previous post and see how many places you can find the Golden Angle in nature. Here is a printable protractor so you can easily make a Golden Angle measuring tool
Use Snow to Your Advantage: Snow Day Learning!
There’s no day like a snow day…in the South that is! We have had a great time for about a week and a half with a large amount of snow where I live, yet we were teaching virtually. I knew this was a losing battle. I mean if I was a child, I definitely wouldn’t be doing schoolwork when record snowfall is happening outside. I gave the kids these options, and do you know what?! I actually had some children participate!!
Here is what I assigned them:
Snow Experiments and Creativity
Do this OR pick two of the following:
Build a snow creation that no one else will think of (especially not a snowman or woman). Add extra details to make it more interesting. Give it an interesting name. You must use at least 2 snow tools to build your sculpture. I showed them 2 snow sculpture videos in which they used tools.
What tools did you use?
How did you use the tools? What did you build? Send me a picture.
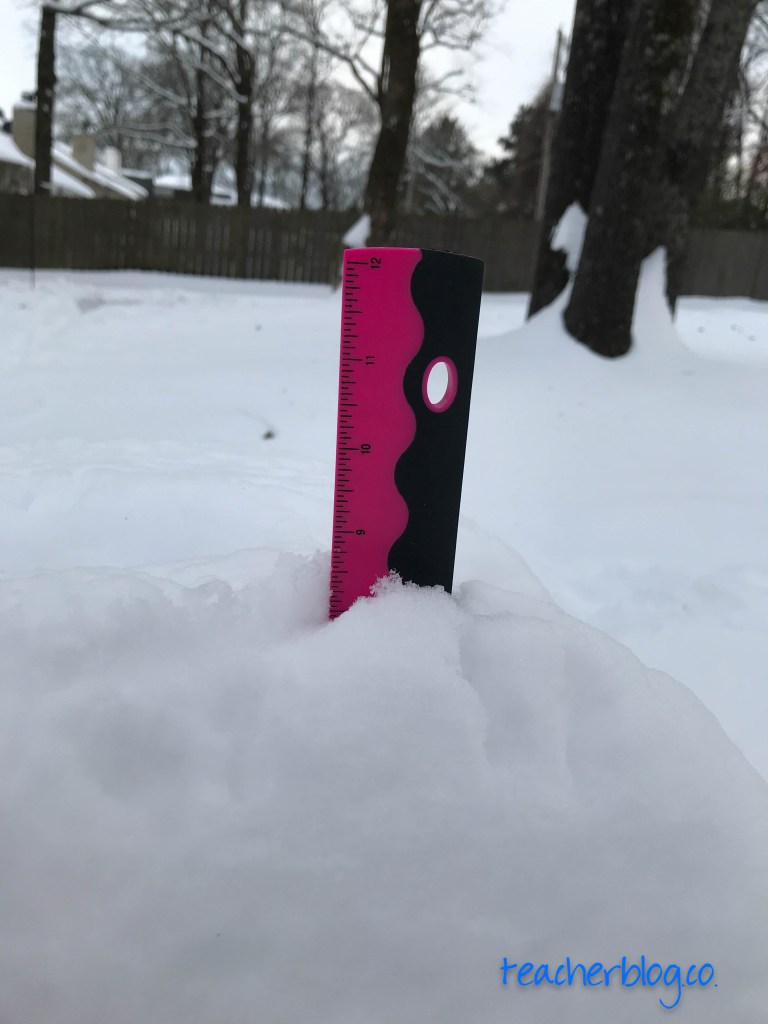
1.Measure the snow in it’s deepest part with a ruler. Use inches. Where did you measure it? How deep was it?

2. Put a some snow in a jar or measuring cup. Mark a line to show how deep it was in the jar. Bring it inside and let it melt. Mark the new line. How did it change? Why do you think this happened?

3. Throw some crackers or breadcrumbs outside. Watch the birds. Feed them. How are they eating since the snow is so deep? What kind of birds do you see? What do you notice?
5. Do you have a thermometer? Take the temperature from your hands outside. Now put on mittens. Put the thermometer inside the mittens. How did the mittens affect the temperature of your hands?
6. Get some containers with a small spout like water bottles and fill them with very cold water. Add food coloring. Make a beautiful picture in the snow by pouring your colored water out on the snow. Send me a picture.
————————————————————————————–
The actual results of my activitiesI had some students measure the snow in a jar and melt the snow in the microwave. Over a zoom we figured out the fractional amount of water that was created after the snow had melted. We discovered that one-fourth of the water remained from the melted snow.
I had students who took their technology device outside to build their snow sculpture so that the other kids could be involved in what they were doing. The sculpture changed several times as it didn’t work out like the child had planned. I also had one child build a snow fort as she turned a tunnel into a structure where her father buried her.
Another student excitedly exclaimed that he had a book about birds for the bird watching activity! (I reminded children they could go inside to do this one and get warm if they got cold in the snow.) This same child seemed to delight in waking his mother up from a nap to ask for food coloring of which they had none.
Lastly, I had a measurement competition going in which children found the depth of snow at their house. Now, I couldn’t tell you if they were being honest, but at least they were pulling out a ruler and thinking about measurement.
I hope you get a chance to experience some of these activities with your students virtually, too!
Wonderful Way to Start Your School Year!
I had seen this idea on another teacher’s wall at a different school many years ago. I thought I would look up the book and create the same thing, but we did this our own way! First, I read The Best Part of Me to the students. This book has lots of black and white pictures of students body parts with a writing piece done by each student about their body part.

Next, I had students brainstorm about their body parts. I had them list a body part they loved, one they found especially useful, and one they wanted to improve their confidence in. They had to write three details about each body part and then choose one to write about. The brainstorming took about one day.
Thirdly, I had the students begin working on the rough draft of their writing pieces. During the next couple of days and lessons, I read Owl Moon to give them the idea of using figurative language. I also read Ted Arnold’s book Parts to the students because it uses exaggeration and rhyme. For students who were wanting to write poetry, this gave them some ideas for their writing. I allowed students to choose whether to write in paragraph or poetry format.


We spent several days perfecting our rough drafts and turning them into final drafts. I had students use the iPads to take pictures of themselves or of one another’s body parts. Then they sent the pictures to my Google Drive and I was able to send them to the copier. We framed them nicely on construction paper. Parents and teachers oohed and aahed over the children’s work!
You can see some of our finished products below.


Another wonderful place to get lesson ideas for this book is on Scholastic here.
I hope you get to do this project sometime. I think you will be so pleased with the results!
How Do You Engage Everyone in a Lesson
- Allow children to use their imagination especially through role play.
- Add challenge.
- Add secrecy.
- Include some mysterious searching.
These are some things I did recently with my students at the end of the school year. I gave them some background on World War II, told them they were secret spies, and that their spy skills were going to save millions of lives.
I further explained about the enigma machine in which Nazis used to send secret messages which we call cryptograms or ciphers. This set the stage for them to stay actively engaged enough to finish a cryptogram. Even students who normally struggle to figure out normal assignments had a renewed interest in solving a puzzle! For the second lesson, the solving of their second puzzle led them to find a location for their next clue. I have never had a more engaged group of students!
Even the teachers of these classrooms I taught were engaged with figuring out the cryptogram. I included the school secretary as one of the clue givers, and students enjoyed leaving the classroom for a moment to find the next clue. When proud students returned from the secretary with their “Secret Agent” badge, this encouraged others to keep working to figure out the puzzle.
These lessons were some of the highlights of my year, and I hope you enjoy them, too. Here is a link to this critical thinking resource on TPT.


