The 2024 Creativity Challenge…
On January 1st, I shared with you an idea you could use in your classroom to start the year off. Students could imagine the numbers in 2024 to be other items besides numbers. I am really proud of some of the results from this activity. See how their creativity blossomed….
left to right top to bottom… shield, potato, fish (look how perspective was used as this student turned the page), archer, hourglass, hotel and white beach, hanger (again page was turned as this student used perspective).
When I taught this lesson, I used an idea from a previous year that I got from the Carly and Adam website.

Snow Lessons for January
I will be sharing with you my K-2 enrichment lessons for January’s return. All of these lessons revolve around snowmen.
In kindergarten we will discuss what imagination is and read the well loved Snowmen at Night.
After we read this, students will design their own snowman and describe what he looks like, what his favorite food is, his name, favorite games, etc. As we finish, students will share their work, and we will discuss who used imagination and originality.
In first grade we will also discuss imagination and originality. Then we will read Sneezy the Snowman.
After we read this story, I will challenge students to think of a way to create Sneezy the Snowman without using snow since he keeps having the problem of melting. Students will have to think of different spherical shapes they might use for the balls that make up a Snowman. For example, they might use basketballs, globes, beachballs, Christmas ornaments, or the like. It will be fun to se who has the most imagination with this lesson!
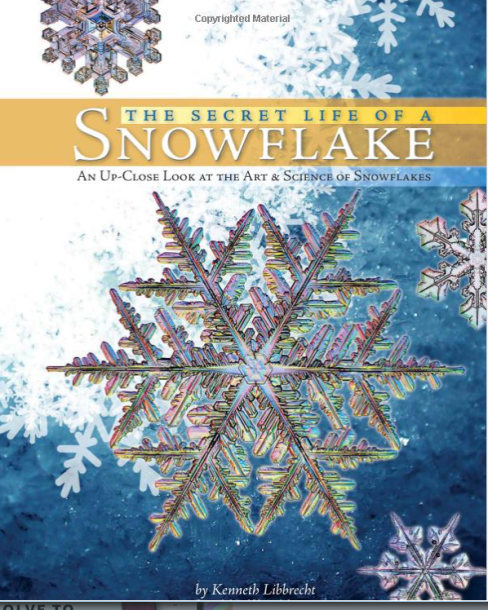
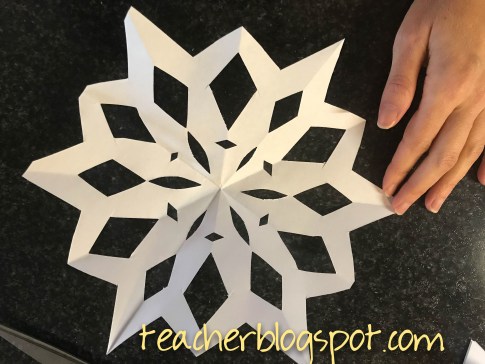
With second grade, I will recycle a lesson I have done before and love! We will create six pointed paper snowflakes after learning about snowflakes in the book below. I will link to that post here.
This year, I may change things up a bit as I use this video in lieu of the book.
Don’t forget Super Teacher Worksheets has lots of snowman resources, too, to round out any unit you may be developing!
Two Things We Did to Make Studying the Ocean Fun

We studied the ocean recently and my students really enjoyed some activities I am going to share with you. We estimated and measured out the first ocean layer (600 feet) with a very long tape measure of 100 feet. After each 100 feet we made a mark with chalk so that we could see each distance. I put some children in charge of carrying chalk, yard sticks, and the measuring tape. When we weren’t on a hard surface anymore, we stuck a yardstick upright in the ground to hold our measurement mark. Measuring this ocean layer not only helped children with their understanding of measurement, they were able to relate the expanse of the sunlight layer to the size of their own small bodies.
Secondly, we built ocean layers in a bottle. The children LOVED this! There are many people who post about this activity on different websites. I will tell you how our worked. We made density predictions first. The bottom layer was the trenches. We used corn syrup here and we dyed it with red, green, and blue food coloring to make it brown. The next layer–the abyss–we used Dawn dish soap. This worked out okay since it was already blue. The midnight layer was water that we dyed blue. I’m not crazy about using water for this layer because it blended in with the soap and you couldn’t really distinguish much of a difference. At least the students knew there was another layer even though it blended. Next, the twilight layer was cooking oil. This easily worked, and I didn’t attempt to dye it since I knew the food coloring I had wouldn’t mix with oil. I kind of like that it vividly shows up as a different color though. Finally, we added the sunlight layer. This is a layer of alcohol. Make sure to get 90% isopropyl alcohol so it doesn’t mix. We added one drop of blue food coloring to a tablespoon of alcohol.
The problems and what I liked. The bottom three layers are dark and you really can’t tell the difference in them. I think it is good that we put the layers in there so students knew that there were three bottom layers. Know that it is hard to tell the difference in the bottom layers though.
Next, know that this is messy, and you will be having to wash materials. I had some small plastic cups available so children could mix the food coloring. I also had funnels available. Funnels are useful to minimize messes, and I had the children pour this over a paper plate. I had students work in partners and hold one another’s bottle while the other child held the funnel and poured. This worked well.
Originally, I thought I would have the children make the layers proportional to the size they really are in the ocean, but I realized after making a sample that it would be more reasonable for the activity to make all the layers one fourth of a cup except the top layer which was a tablespoon. I gave the children labels and had them write the name of each layer on them as you can see from the pictures. The whole activity took around 90 minutes after instructions were given. My students are well behaved, and I probably wouldn’t have done this if they hadn’t been. If you want to still do this with students who don’t follow directions well, I suggest only making the top three layers and using smaller containers. Happy “diving”!


Don’t Throw Out a Broken Clock! You Can Do This
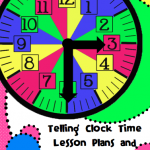
In the current school I work in, we had many broken clocks that wouldn’t keep time. When I discovered some of our smartest students couldn’t tell time, I had an idea! I thought I would use one of these old and broken clocks for a teaching tool. I took it home and broke the hard plastic off the front. Then I ruled off sections on the clock with lines and put circles around the numbers. Each number’s circle color matches the section behind it. The reason for this is to help children know that if they see the hour hand anywhere in the colored section that the hour belongs to the number with the same color. I had a little friend who was very interested in telling time.

If you like this idea for teaching children analog time, you will love the Telling Clock Time unit here! There are these ideas and more used to teach analog time.
Get Outdoors to Teach Angles!

This was one of the last things I did with students last school year. I had them build an angletron which is basically a piece of paper that you have folded into an certain angle so that you don’t have to carry around a protractor. We folded them to the size of the Golden Angle and then went to find Golden Angles in nature outside. In case you don’t know the Golden Angle is 137.5 degrees. This is what makes nature look natural. It is everywhere in nature! This makes for a treasure hunt for kids. Here you can see it matches up perfectly to the veins of an oak tree leaf. I also found a Golden Angle in the way the blades grew in a tall piece of “nut grass” as my mom calls it.
To make this angletron I just folded a piece of paper in half=180 degrees, then folded it again in half to equal 90 degrees. I was then able to fold each bottom side of the 180 degree angle up to meet the center 90 degree crease. This allowed me to count, 45, 45, 45 to get to 135 degrees. This is pretty close to 137, so I just estimated a couple of more degrees to make my angletron. It doesn’t matter that the outside edges aren’t perfect as long as the inside corner is the right number of degrees to measure your angles.
You can GO HERE for a video version of making angletrons.
A fun question to ask students is if the Golden Angle is 137.5 degrees how many degrees are left over in a circle (360 degrees)? The answer is 222.5. Hmmm? Interesting! There is so much to explore with the Golden Angle and Fibonacci sequences in nature! Happy Hunting!
Passion Projects Part 2
As my students floundered to decide on a topic, I revisited the website I mentioned in then previous post–keepemthinking.com. I went back to use the book she suggested Junkyard Wonders. Whether this helped students pick a “passion” or not doesn’t matter. What does matter is that the book had a very powerful message about pursuing what matters to you and how it can pave the way for a successful future. I had planned to show it over two class periods because it is a long story, but the students really wanted to hear the second part, so I acquiesced.
The students made the connection from the book to the project without me saying much except for “why do you think I showed you this?” I used her idea for a project proposal. Finally the project started to take shape. Those students who wouldn’t commit to a topic before were now committing. The fact that I make them have everything laid out, that they have to create a “burning question”, and that we both sign off on it leads to their committal. Then when they think about changing ideas, they aren’t allowed to because we signed and committed.
I love the Wonderopolis website she suggests, too! What a wealth of curiosities to help students settle on a question. Make sure you check out this website!
I am sure that the author of this blog has a quality passion project unit. I probably would have bought it if I hadn’t already bought two other people’s resources. What I did like about the other resources, however, is that they had plenty of space for brainstorming. I also like that they had a place for students to check in with one another. Instead of all my students checking in with me, they are telling each other the progress they made. No one wants to tell someone else they accomplished nothing so this becomes affective. I love it!
One of the Best Creativity Lessons I Have Ever Done! {Giveaway}
Teachers and kids alike enjoyed this lesson. First I had students tell me about a time they made a mind picture from something such as weird wallpaper or clouds after looking at them. Then I read them the book Beautiful Oops by Barney Saltzberg. This book has multiple pictures where “mistakes” have been turned into something beautiful. See below…


For example, torn paper is turned into a dog.


Holes are turned into a camera like figure that children can look through. With each new page, there is something new to explore.
For the lesson, I use the different ideas from the book and put them on paper. For example, I put random paint on paper, random tears on paper, holes in paper, folds in the paper, and glued pieces of tissue to paper. See below…


I got these ideas from my fabulous colleague! She’s the best!

So I make a class set of various ones of the beautiful oops papers and then I give them to students to make the beautiful oops into something else. If they are able to turn it into something wonderful, I am pleased!


GIVEAWAY DETAILS:
Prize: $25 Teachers Pay Teachers Gift Card
GIVEAWAY DETAILS:
Prize: $100 Teachers Pay Teachers Gift Card
Giveaway Organized by: Kelly Malloy (An Apple for the Teacher)
Co-hosts: An Apple for the Teacher, The Fun Factory, Mrs Wenning’s Classroom, Sparking Children’s Thinkibility, TheBeezyTeacher, A Plus Kids, The Froggy Factory, StudentSavvy, Kelli C, Jackie Crews, Ms. K, Fifth is my JAM, Star Kids, Chocolate 4 Teachers, Catch My Products, Pint Size Learners, Love Luck and Laughter, Kamp Kindergarten, Julie’s Learning Corner, The Education Highway, and Mrs Hansens Helpfuls.
Rules: Use the Rafflecopter to enter. Giveaway ends 3/13/20 and is open worldwide.
Are you a Teacher Blogger or Teachers pay Teachers seller who wants to participate in giveaways like these to grow your store and social media? Click here to find out how you can join our totally awesome group of bloggers!
Rules: Use the Rafflecopter to enter. Giveaway ends 3/16/20 and is open worldwide.
Are you a Teacher Blogger or Teachers pay Teachers seller who wants to participate in giveaways like these to grow your store and social media? Click here to find out how you can join our totally awesome group of bloggers!
<a class=”rcptr” href=”http://www.rafflecopter.com/rafl/display/c396cb38390/” rel=”nofollow” data-raflid=”c396cb38390″ data-theme=”classic” data-template=”” id=”rcwidget_et5zs8rt”>a Rafflecopter giveaway</a>
<script src=”https://widget-prime.rafflecopter.com/launch.js“></script>
Subtraction Flash Cards Like You Have Never Used Them…
I remember teaching subtraction before I learned the strategies to teach with. I used to tell kids to “learn all your 1’s, then learn all your 2’s, and then your 3’s etc., but it really seemed that many of the kids stayed on the same subtraction facts for a long time and never learned them. As a result, I made this packet of flashcards but with strategies attached so that children could have a pattern to which to attach their learning. If our minds can find a pattern then it is much easier to learn something and remember it. These also have printable backs to make your life easier!

There are suggestions for how to use them and place them so that patterns are easier to learn. For example, see below…
Here is the tried and true think addition strategy that everyone knows…

How about subtracting 9…what a doozy for many kids! This strategy helps you think of using 10 as a helper in subtraction to get the answers for subtracting 9.

I have included a chart with 16 different ways to group subtraction facts for teaching patterns. All of your students may not need all 16 ways and many of the strategies repeat facts so that students have multiple ways to think of getting the answer if they need them.
Take a moment to stop by TPT and view the preview.

GIVEAWAY DETAILS:
Prize: $100 Teachers Pay Teachers Gift Card
Giveaway Organized by: Kelly Malloy (An Apple for the Teacher)
Co-hosts: An Apple for the Teacher, Kindergarten Is Crazy, Pint Size Learners, Mickey’s Place, Ms. K, 180 Days of Reading, Teacherof20, Star Kids, Mrs Wenning’s Classroom, Peas in A Pod, The Literacy Garden, Chocolate 4 Teachers, Jackie Crews, A Plus Kids, The Craft of Teaching, Kamp Kindergarten, Believe to Achieve by Anne Rozell, Globe Trottin’ Kids, Resource Room Relevance, Teach Me T, TheBeezyTeacher, and The Monkey Market.
Rules: Use the Rafflecopter to enter. Giveaway ends 1/13/20 and is open worldwide.
Are you a Teacher Blogger or Teachers pay Teachers seller who wants to participate in giveaways like these to grow your store and social media? Click here to find out how you can join our totally awesome group of bloggers!
a Rafflecopter giveawayWhat Do You Do in Your Math Intervention Group?
So, I have a math intervention group. I have done intervention lots of ways…and the thing is, there are always core things that kids struggle with. Those things without a double are always addition, subtraction, and multiplication facts. Next, they struggle with the standard regrouping algorithm. And, why do they struggle? BECAUSE, of course, no one sits with them at home to help them learn these things if the concepts don’t sink in during school time.
Enter me. I have been working with some students the past few weeks on subtraction regrouping…with success! Here is what I have done, and what I have discovered. First of all, several of the intervention students were able to regroup UNTIL they had to regroup across zeros. They weren’t sure what to do when they had to borrow two places over. How did I figure this out you ask? Well, with my group of four students, I gave them a worksheet. (gasp! a worksheet??!!) Yes, I gave them a worksheet and had them work a few and checked to see which ones they were getting correct and which ones they were missing. I would have them work one problem and hand me the sheet to check. This way they were getting immediate feedback. During this time, I realized that they weren’t getting the answers right unless they borrowed across zeros or had to borrow two places over. I used and am so thankful for Super Teacher Worksheets subtraction worksheet generator! This conveniently allowed me to print a new worksheet (complete with answer key) when I felt they needed practice.
Now when I realized they needed help with regrouping across zeros, I realized there was a regrouping misunderstanding. So, I used the Singapore math number discs method to show them what was happening when they were regrouping. After showing them and having them do one with me, the next day they performed a lot better on their subtraction regrouping problems. I have a SMART board lesson and worksheets if you would like some for students to practice with. The grid is already made for the students…these however do not have seven digits like the worksheet above.
A few other things I did to help the students think about the regrouping process were.
- Say this little rhyme…”More on the floor, go next door, and get 10 more”. This way they would always know they were bringing ten over…not 9, not 8.
- Sometimes when students want to skip over a place value column, I would describe it as driving in traffic. Your car doesn’t just fly over the other column, it has to change lanes one at a time…it can’t be a helicopter.
- Another idea I mention is place value columns in relation to the drawers in a cash register. If you cash in your $100 bill for others, you trade it in for 10 $10, then you trade in the $10 for 10 $1 bills.
Try these things and soon you will be on your way to having expert subtraction regroupers!
