Need a Cheap and Easy Book Character Costume?
In case you are needing a quick costume for book character day or for Halloween, you can try this. Now this is a bit of a stretch on the definition of “character” but everyone was impressed with the creativity. All you need is:
*a few pipe cleaners
*purple balloons
*green pipe cleaners
*purple masking tape or hot glue if you don’t care about ruining your sweatshirt
Now, I could have filled up my sweatshirt with way more balloons, but the balloons make it a bit hard to maneuver, so I didn’t fill the sweatshirt up completely. I put the sweatshirt on after I arrived at school so that I had a shirt underneath. This way I could move during the rest of the day. As you can imagine, the younger kids especially enjoyed touching the balloons as we had our school parade! I hope this sparks an idea for your last minute costume! 🙂
Have You Ever Needed a Number Line That Counts Past 1,000?
By request I made this number line which counts from 900 to 1,200 to hang on your classroom wall. This number line spans almost 11 feet. There are matching base ten blocks for every increment of 25, but the number line has lines for every increment of one. This is a great visual tool for those students who struggle to comprehend the transition between hundreds and thousands. You can see this tool pictured below. Stop by my TPT store to pick one up.
Register to Win the $10 Gift Card for the TPT Sale!
Make sure to take this opportunity to register to win this $10 TPT gift card for the Cyber Monday and Tuesday Sale on TPT!
To win, all you have to do is comment my teacherblogspot Facebook page with an item you find most appealing to use the $10 gift card on from my store. I will choose someone who commented at random on Monday evening at 8 p.m. CST.
How You Can Inspire Thankfulness in Your Students!
This year I wanted to spur my kids on to be more thankful, so I did this… I really didn’t do this just because it was Thanksgiving time but because I wanted them to appreciate what they have all the time.
First, I read my students a true story about kids living in Africa who were orphaned and lived in a garbage dump. They ran after a garbage truck to get scraps of food for survival. One of the kids living in the dump had their baby sister killed by wild jackals. They had no one to help them–no parents or guardians of any sort. I read this story from a newsletter I receive from a Christian missionary. You can read more about him if you click the link above. I of course had to leave the Christian stuff out because I work in a public school, but the story still is impactful for kids to appreciate what we have.
Second, I showed my students a video about a man who was about to die because he had ALS. His mission was to spread as much kindness as he could before he died. I really made them think about how they wanted to be remembered. Did they want to be remembered for how kind they were or for how badly they treated others. This video is here. The video really touched the kids hearts.
[embedyt] https://www.youtube.com/watch?v=zYSc-WGenAw[/embedyt]
After we discussed both of these things, I told them they would be getting a little journal. For the next four weeks the kids mission was to write down things they were thankful for each day and one kind thing that they did each day. The students were really excited to get their journals, but I made them wait one class period before I gave them the journals. I also informed parents before they received them so that parents knew what was expected of their children.
I bought these journals for 88 cents in a 3 pack at Wal-mart which makes them about 29 cents each. The notebooks are about 3 x 4 inches. You can also get some at the Dollar Tree for…..you guessed it!…. a dollar, which makes them about 33 cents each. In my opinion the ones at Wal-Mart are better looking because they are solid colored.
So here are the rules I gave the kids:
- You must write three things you are thankful for each day.
- The items you are thankful for cannot repeat.
- For example, if today you say I am thankful for my momma, my daddy, and my dog, on another day you can’t say I’m thankful for my momma, my bicycle, and my brother because momma repeats.
- If you lose it, you buy yourself another one. I will not replace your journal.
- Underneath the line you are to write one kind thing you did that day.
- This can be anything kind. It doesn’t have to be extravagant. Their act of kindness can be just picking up a scrap of trash or giving someone a compliment.
- The act of kindness cannot repeat on a different day either.
Some kids ask what happens if they miss a day. I tell them not to worry but that they can go back and add something if they miss a day. They must continue with their thankfulness project (notebook) even on weekends and vacations. There will be a little incentive for them if they complete the project–namely Dollar Tree Christmas prizes.
I hope this idea inspires you to instill thankfulness in your own students! Happy Thanksgiving season!
Adding & Subtracting Ten(s)–1st Grade Skill or Intervention?
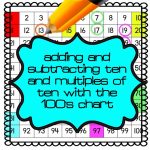
There are certain skills that if not learned early in math will be a detriment throughout a student’s entire math career. Learning to add ten or subtract ten is one of these skills. In later elementary grades, if the simplistic skill of adding and subtracting ten is not learned students will struggle with other math concepts.
For these reasons, I believe that is why this product is one of the best sellers in my shop. The skill of adding or subtracting ten is visually taught through patterns on the hundreds chart. I have newly revised this product to include answer keys, new borders, and new fonts. If you are looking for a product to teach your students to add or subtract ten— a skill they will need for their entire school career, look no further.
A Discovering Patterns worksheet with the hundreds chart and Mental Math Fluency Check are included in this packet for each of the following:
*Adding 10 to a One-Digit Number
*Adding 10 to Multiples of 10
*Subtracting 10 from Multiples of 10
*Adding 10 within 100
*Subtracting 10 within 100
*Adding Multiples of 10 within 100
*Subtracting Multiples of 10 within 100
Answer keys are also included.
Are You Using Addition Flashcards Effectively?
I recently created a video showing you how to use Addition Flashcards effectively. There are many ways to do this effectively using patterns. In the video I show you two of these patterns you can use to teach addition math facts. This video is a result of a parent teacher conference of which I was a part. During the conference the classroom teacher told the parent to use flashcards by having the child make a stack of the ones she knew and the ones she didn’t know. Because of this, I realize many people aren’t aware of how flashcards can be used with patterns to alleviate the rote memorization. Using patterns allows students a way to relate their learning to prior knowledge. Therefore student learning becomes more than just memorizing facts. To learn more watch below…
[embedyt] https://www.youtube.com/watch?v=-SDyhc9kdiU[/embedyt]
The flashcards in this video came from this math packet below:
Why Won’t My Students STOP TALKING??!!
What do you do when your students talk too much? I know it drives you insane! Is there a way to curb this behavior without taking away a privilege from everyone–moving clips, taking away Dojo Points etc.?
I’m going to share with you what works for me. First I start out the year with an anchor chart like the one pictured here.

I review each of the five items on the chart. I have students practice acting like each of the five expectations on the chart. For example, I have them read the expectations with me. When we read number three I have the students whisper in their teams. When we read number four I have them practice using low voices in teams. We talk about how students’ bodies look when students are using soft voices–how their bodies are close together. I even have children practice raising their hands to ask a question. We discuss how a child waits to be called on before making any noise, how students don’t get called on when making “ooh, ooh, monkey noises” etc.
Now, what happens if children are talking too loudly while working? After I have given them a warning or two about the class volume, I have found this to be a simple solution. “Students, you have been talking too loudly. Because of this, we are going to sit in absolute silence for one minute. If after one minute no one has made a sound, you will be able to talk again in low voices. During that minute if one person makes a sound–even a whisper–I will start the one minute over.”
I hold to what I said, and the noise magically lowers. Sometimes it seems that children just needed a break from their conversation and noise level to readjust their volume. I hope these tips help you. It is never too late in the year to establish your expectations. Don’t give up if you are struggling with a talkative class. 🙂
Multiplication Hand Tricks–Multiplying by 4s
Again by popular request, here is a video showing how students can use their fingers to multiply by four. This is my second video ever! I think I’m getting better at it! 🙂
This video was made in response to an earlier blog post here. Watch this for professional development, or allow your students to watch it for a brand new strategy for their math “tool box”. Enjoy!
[embedyt] https://www.youtube.com/watch?v=nKC7bgV9W3Y[/embedyt]
You may also like to watch this video about multiplying by 3s.

