Get Outdoors to Teach Angles!

This was one of the last things I did with students last school year. I had them build an angletron which is basically a piece of paper that you have folded into an certain angle so that you don’t have to carry around a protractor. We folded them to the size of the Golden Angle and then went to find Golden Angles in nature outside. In case you don’t know the Golden Angle is 137.5 degrees. This is what makes nature look natural. It is everywhere in nature! This makes for a treasure hunt for kids. Here you can see it matches up perfectly to the veins of an oak tree leaf. I also found a Golden Angle in the way the blades grew in a tall piece of “nut grass” as my mom calls it.
To make this angletron I just folded a piece of paper in half=180 degrees, then folded it again in half to equal 90 degrees. I was then able to fold each bottom side of the 180 degree angle up to meet the center 90 degree crease. This allowed me to count, 45, 45, 45 to get to 135 degrees. This is pretty close to 137, so I just estimated a couple of more degrees to make my angletron. It doesn’t matter that the outside edges aren’t perfect as long as the inside corner is the right number of degrees to measure your angles.
You can GO HERE for a video version of making angletrons.
A fun question to ask students is if the Golden Angle is 137.5 degrees how many degrees are left over in a circle (360 degrees)? The answer is 222.5. Hmmm? Interesting! There is so much to explore with the Golden Angle and Fibonacci sequences in nature! Happy Hunting!
Amazing Math Enrichment!
Are you looking for something to fill time towards the end of the school year? Do this amazing group of activities revolving around the Fibonacci sequence. For a classroom teacher this would probably take about a week. I did this with higher level learners in fifth grade. They were intrigued.
Lesson 1: First we watched this video:
Then we added Fibonacci numbers up to sequence 30. This was good for students who needed to add some larger digit numbers since they get large rather fast. We talked about what Fibonacci numbers were and where they were located on our bodies, such as in the spiral of our ears, hair, and fingerprints. I brought a few pinecones to examine.
Lesson 2: We watched this video.
Then we went outside and found pine cones, I brought some raw broccoli, and I got some daisies at the local grocery store. We examined these items for Fibonacci spirals and counted the number of petals and looked for spirals.
Lesson 3: We drew a Fibonacci Spiral and talked again about where we could find it on our own body. This video shows how to draw a Fibonacci Spiral more slowly.
Lesson 4: We found the golden ratio. I had students pull out their Fibonacci numbers that they had figured out in the first lesson. Students need to divide the larger Fibonacci number by the smaller preceding one all the way down the sequences. I allowed them to use calculators to do this. I had them record 10 decimal places after the decimal. Eventually students end up seeing the pattern.
Lesson 5: (This took 2 classes) We measured our body parts with a measuring tape and ruler. If you want these measurements to be more accurate, I figured out the second time that I wanted students to use the centimeter side of the measuring tape so that the Golden Ratio would turn out more accurately. This way students don’t have to keep up with fractions of an inch. I did use a product on TPT for students to do this. There are several which have places for students to fill the measurements of their body. They actually did get 1.6 on some of their measurements!!!
Lesson 6: We made an angletron with 137.5 degrees which also is related to the Fibonacci sequences.
Then we went outside with our angletron and tried to find Golden Angles. I found one and asked the children if it was truly a Golden angle. They confirmed the veins in the leaf of an oak tree were a Golden Angle!! WOW!!!!!WOW!!!
Try this Great Field Trip!
A few years ago I went on THE best field trip EVER! It is a place your wouldn’t think of going. We went to the water plant. We got to see how water was gathered, filtered, and sanitized. I know not everyone has the same water plant I have, but this is a great trip worth looking into for your area. We got to do a virtual trip this year, which was also great! I’m going to list several reasons why.
- Engineering Process. Even though we didn’t watch any engineers, we got to learn about the filtration process step by step. There is a lot of thought that goes into filtering water and treating the water with different chemicals. It moves throughout several pools to filter before chemicals are added. Very talented engineers had to design this process for it to be safe for us
- Chemistry. Students were able to learn about the chemicals chlorine and fluoride. They learned why these chemicals are important for the water that comes from our faucet.
- Measurement. Our students were able to see how large a pipe was compared to their size. They are about six feet in diameter.
- Appreciation. Students listened to the workers at the plant tell about how they watch computer screens on a 24 hour basis to see if there are any leaks that would indicate there is a problem. These workers have to work even when weather is bad to protect the water supply. This will make you appreciate what comes out of the faucet even more.
- Career opportunities. There are many, many people that work at a water plant providing many career opportunities for children to aspire towards. They can learn first hand from people who hold jobs in a career field they may be interested in.
Students said that this was one of their favorite activities this year–learning about the water plant.
Consider other overlooked places for field trips, also. Have you considered your local electric plant or recycling center? Sometimes learning about the seemingly ordinary and mundane can draw student curiosity.
Team Building with Tools

Help your children understand one another while teaching analogies. Which are you– a screwdriver, a hammer, a tape measure, a paintbrush, a saw, sandpaper, or another tool? Why are you like this tool? What are the strengths and weaknesses of this tool? Discussing these things can help students talk to one another without hurting each other’s feelings because then they are talking about tool attributes instead of attacking a person. Below I have placed a worksheet to help you facilitate this discussion in your classroom.

Use Snow to Your Advantage: Snow Day Learning!
There’s no day like a snow day…in the South that is! We have had a great time for about a week and a half with a large amount of snow where I live, yet we were teaching virtually. I knew this was a losing battle. I mean if I was a child, I definitely wouldn’t be doing schoolwork when record snowfall is happening outside. I gave the kids these options, and do you know what?! I actually had some children participate!!
Here is what I assigned them:
Snow Experiments and Creativity
Do this OR pick two of the following:
Build a snow creation that no one else will think of (especially not a snowman or woman). Add extra details to make it more interesting. Give it an interesting name. You must use at least 2 snow tools to build your sculpture. I showed them 2 snow sculpture videos in which they used tools.
What tools did you use?
How did you use the tools? What did you build? Send me a picture.
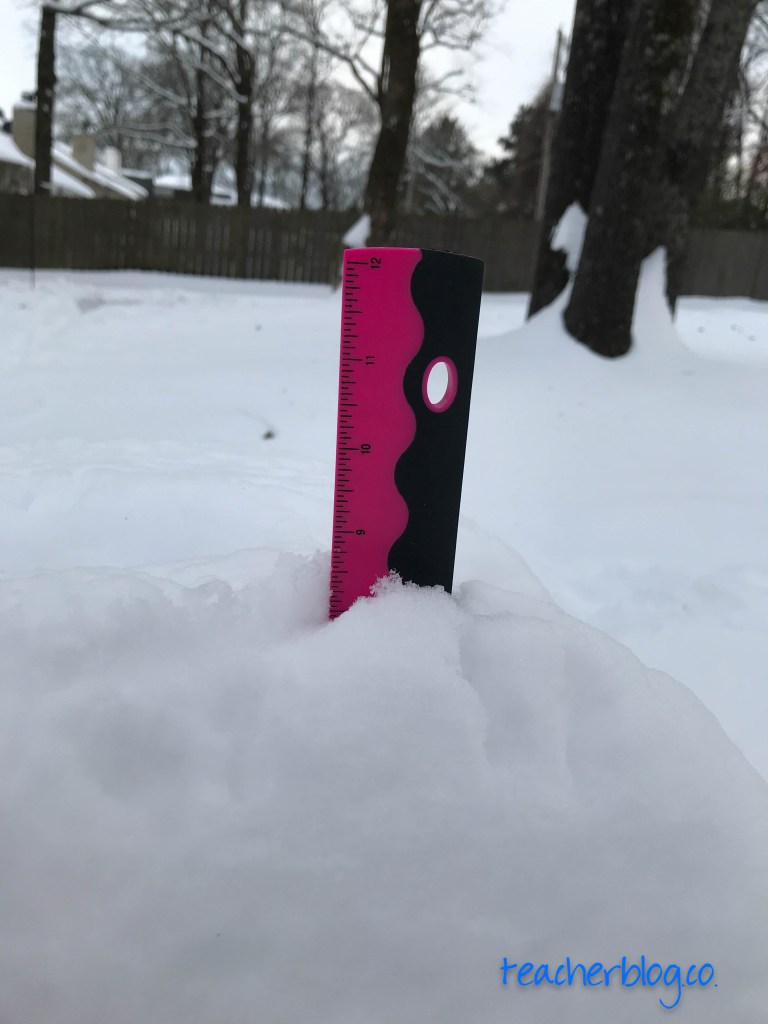
1.Measure the snow in it’s deepest part with a ruler. Use inches. Where did you measure it? How deep was it?

2. Put a some snow in a jar or measuring cup. Mark a line to show how deep it was in the jar. Bring it inside and let it melt. Mark the new line. How did it change? Why do you think this happened?

3. Throw some crackers or breadcrumbs outside. Watch the birds. Feed them. How are they eating since the snow is so deep? What kind of birds do you see? What do you notice?
5. Do you have a thermometer? Take the temperature from your hands outside. Now put on mittens. Put the thermometer inside the mittens. How did the mittens affect the temperature of your hands?
6. Get some containers with a small spout like water bottles and fill them with very cold water. Add food coloring. Make a beautiful picture in the snow by pouring your colored water out on the snow. Send me a picture.
————————————————————————————–
The actual results of my activitiesI had some students measure the snow in a jar and melt the snow in the microwave. Over a zoom we figured out the fractional amount of water that was created after the snow had melted. We discovered that one-fourth of the water remained from the melted snow.
I had students who took their technology device outside to build their snow sculpture so that the other kids could be involved in what they were doing. The sculpture changed several times as it didn’t work out like the child had planned. I also had one child build a snow fort as she turned a tunnel into a structure where her father buried her.
Another student excitedly exclaimed that he had a book about birds for the bird watching activity! (I reminded children they could go inside to do this one and get warm if they got cold in the snow.) This same child seemed to delight in waking his mother up from a nap to ask for food coloring of which they had none.
Lastly, I had a measurement competition going in which children found the depth of snow at their house. Now, I couldn’t tell you if they were being honest, but at least they were pulling out a ruler and thinking about measurement.
I hope you get a chance to experience some of these activities with your students virtually, too!
Passion Projects Part 2
As my students floundered to decide on a topic, I revisited the website I mentioned in then previous post–keepemthinking.com. I went back to use the book she suggested Junkyard Wonders. Whether this helped students pick a “passion” or not doesn’t matter. What does matter is that the book had a very powerful message about pursuing what matters to you and how it can pave the way for a successful future. I had planned to show it over two class periods because it is a long story, but the students really wanted to hear the second part, so I acquiesced.
The students made the connection from the book to the project without me saying much except for “why do you think I showed you this?” I used her idea for a project proposal. Finally the project started to take shape. Those students who wouldn’t commit to a topic before were now committing. The fact that I make them have everything laid out, that they have to create a “burning question”, and that we both sign off on it leads to their committal. Then when they think about changing ideas, they aren’t allowed to because we signed and committed.
I love the Wonderopolis website she suggests, too! What a wealth of curiosities to help students settle on a question. Make sure you check out this website!
I am sure that the author of this blog has a quality passion project unit. I probably would have bought it if I hadn’t already bought two other people’s resources. What I did like about the other resources, however, is that they had plenty of space for brainstorming. I also like that they had a place for students to check in with one another. Instead of all my students checking in with me, they are telling each other the progress they made. No one wants to tell someone else they accomplished nothing so this becomes affective. I love it!
Passion Projects
A couple of teacher friends of mine had talked about Passion Projects and I was intrigued. Does it not sound SO great to allow students to study their own passions and turn it into some type of presentation? I started where one of my friends said to start. That was on Teachers Pay Teachers. I stopped there and bought a couple of units. Feeling armed, I made a packet out of the two products I bought. It was a nice start, but I soon discovered I hadn’t given enough background information for a successful start. I had students who didn’t know what “passion” they wanted to pursue. I had other students who wanted to study sports or video games. At the time I asked them to let me think about it and that they better have a great way to learn something from these. A while later I went ahead and told them that sports and video games were off limits.
Then one of these teacher friends told me about this website and things started to take a turn for the better! Check out this post on using passion projects in elementary school at Keepemthinking.com. I really love the books this blogger suggests you start with– especially Junkyard Wonders. My students had such a great response to this book! I will update you in a several weeks to let you know how their projects are going.

More Free and Editable AMI—Electricity
So, before the rest of the year became virtual, my students wanted to learn about electricity. I was rather disappointed that we wouldn’t get to learn about electricity, so I decided to give them my best effort at a week with AMI electricity learning. Below are my plans. You are welcome to copy, paste and adapt them for your students.
Learn About Electricity
FUN AND OPTIONAL ACTIVITIES for students
1.Unsafe electric conditions.
Watch this. https://m.youtube.com/watch?v=a52UVl3FoSA
Now, look around your house. Do you see any unsafe electricalconditions in your house? Tell your parents
2. How does electricity get to your house? Watch this.
https://m.youtube.com/watch?v=20Vb6hlLQS
3. Again with your parent’s permission turn on all the lights andmany items that use electricity. Go back and read the meter. Writedown the number. How did it change, and what did you notice?
4. Ask your parents if they can let you see all of the electric bills. Make a bar graph or line graph to show the cost of electricity foreach month for the last year. Which month was most expensive forelectricity? Why do you think so? Discuss this with your parents.
5. Build a lemon battery. This is a rather involved project, but youcan get all the materials at Wal-Mart. You can find alligator clipsand small light bulbs in the automotive section.
https://www.instructables.com/id/Lemon-Batteries-Lighting-an-LED-with-Lemons/
6. Read your electric meter outside. Write down the number, Beforeyou do this, turn off as many lights and appliances as possible. Askyour parents’ permission before you go outside, if you’re not surewhat your electric meter looks like or how to read it watch this.https://m.youtube.com/watch?v=I6UPkncvFhw.
7. Take a picture and post it to Dojo. Did you get the lemon battery to work? Do you think other fruits or vegetables would work? Which ones?
_____
I know number 7 is a little steep to ask of parents, but some students might accomplish this and what a much better idea than playing video games all day!
Free and Editable AMI Enrichment with Fibonacci Sequences!
I recently set up chat groups for my students, so that I could talk to them during these AMI days that we are wading through. One of the comments from a student was “are you ‘board’ to death?” Other kids chimed in that they were indeed bored, too! I had already been thinking on what I could do to make my 5th graders’ lives more interesting.
As a result, I made these “Optional but Fun Activities”. Students predominately explore Fibonacci sequences, find examples of them, draw a golden rectangle, and draw artwork using Fibonacci Spirals. One of the activities allows them to go outside, which I think is so important with them being tied to a screen all day! I hope you can use this and your kids can get some enjoyment out of it too! The below videos will give you an idea about Fibonacci sequences if you don’t already know about them.
[embedyt] https://www.youtube.com/watch?v=nt2OlMAJj6o[/embedyt] [embedyt] https://www.youtube.com/watch?v=ahXIMUkSXX0[/embedyt] [embedyt] https://www.youtube.com/watch?v=lOIP_Z_-0Hs[/embedyt]
