


Angles in the Bathroom?
In response to the poor scores on a recent geometry quiz, I took advantage of the prime real estate near the bathrooms. Students in this particular class pass this area often, so why not put some geometry review in their path? I made good use of a roll of painter’s tape by making types of lines and angles all around the bathroom entrances and water fountains.


The yellow sign below says to identify the figures and tells students to check the answer key to see if they are correct.


Then in an easily accessible place outside of the bathroom, I placed an answer key for students to check themselves
Underneath the cover are the answers…

I had more types of lines posted than are pictured above, but I thought a few of the pictures would give you the idea. I’ve already seen kids looking to check their work on their way down the hallway. 🙂
If you remember from one of my previous posts, then you will remember I have a weighing station outside the bathroom. I also have a location for students to measure their own height with a measuring tape. I still see students stop by occasionally to measure themselves. I had one with a sideways grin tell me today, “I’m 47 inches.”
I hope this inspires you to do something similar with your students!
100th Day Costume Fun!
Here are a few costumes from some of the kids for the hundredth day of school…I thought you would enjoy a look at the creativity! You may even get an idea for your costume!
Lots of kids used 100 hearts since Valentine’s Day is soon…


100 candy conversation hearts…

Paper hearts counting by 1’s…

Paper hearts counting by 10’s…

Up close picture of the paper hearts above…

100 puzzle pieces…

100 puff balls…

100 tally marks…

100 eye balls…

100 equations…

50 groups of 2 = 100

Two kids dressed alike with eyeballs that made mathematical equations…


100 years old…

Math facts with answers that add up to 100 on the front and back…very clever!

Happy 100th Day!
Hooray!
Try this 100th Day Costume…
I already had created my Masked Mathemagician character who comes for a visit at unsuspecting times at school…but I added a little to her this year :).
I had to figure out a way to make the costume include 100 items. So what did I do? I wrote 100 100’s on the back of my Mathemagician cape! To make the plastic tablecloth cape, I found directions on some blogs here and here. Then I started cutting freehanded. When I bought the plastic table cloth, it was so large that if I messed up there was plenty left to try cutting the shape again. The first time worked though. I used two small sticky velcro pieces to attach the pieces around the neck. Here is the best picture of the cape from the back. I know my hair looks a mess from the back :o…I had to hide it in a bun to pull off the whole Mathemagician effect!

It took me forever to make the logo for my Masked Mathemagician Emblem in case you want to use my idea at your own school you can download the emblem by clicking the link.

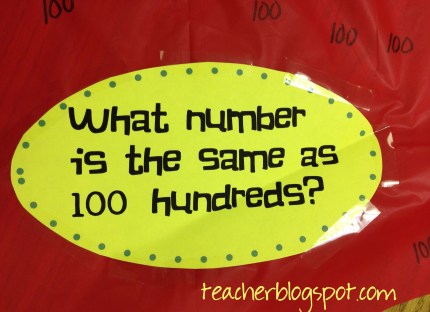
I placed the sign above at the bottom of my cape. I told the kids that if they figured out the answer they could win a prize!
I will be posting more 100th day fun soon…come back to see!
Use These to Help Students Formulate Understanding of Decimals
What does a day out of school equal? A finished product for Teachers Pay Teachers! Here is a little something I have been working on that I was able to complete today since we got a surprising day off from work due to the icy weather.
Because decimals seem abstract to students–especially when the zeros fall off the ends, I created these decimal pocket chart number cards. The zeros are grayed out so that students begin to make the connection that the zeros don’t necessarily have to be on the end of a decimal number. The number cards are great for 4th graders just beginning to make the connection that the zeros have no value.

The cards come in 3 different color variations–red backgrounds with white numbers…

white backgrounds with red numbers….

and white backgrounds with black numbers. The black numbers offer a host of variations if printed on colored card stock. The pattern possibilities using colored card stock are endless.

The numbers also come in two different variations–without the whole number 1 and with the whole number 1. This will aid in giving students the understanding that decimal numbers may or may not have whole numbers in front of them.
Come by my store to check these out!
Simplify Fractions Using These
I must have found this idea on Pinterest somewhere…I would give credit if I remembered where, but it works so well! I love it–Factoring Rainbows! About 2 weeks ago I used this with the fifth graders who were struggling with simplifying fractions. Using this trick really helped them. Below you can see how it works.

There is a rainbow for both the numerator and the denominator. The rainbows always start with 1 and the number itself on the first arch. Then each arch underneath progresses with the next largest factor. With the 15 rainbow, 2 was not a factor, so I skipped to 3. Three and 5 are factor pairs. I could then try the factor of 4, but the only other number that could be a factor would be 4 itself. I know 4 x 4 is 16, so that won’t make 15. Then I could move on to a factor of 5, but I know that 5 has already been used. When the factors repeat in the rainbow, then I know I have found all of the factors. To simplify fractions, circle the largest common number in both rainbows (GCF) and divide both the numerator and denominator by the largest common factor.

Here is another example above. I factored both the numerator–16 and the denominator–18. I started the factor rainbow of 16 with an arch having the factor pair 1 and 16. Then I moved on to an arch with the factor pair 2 and 8. Three won’t equally divide into 16, so 3 is skipped. Next, I know 4 and 4 will multiply to make 16. Because these numbers repeat, I know the 16 factor rainbow is complete. The factor rainbow of 18 begins with the first arch’s factor pair 1 and 18. Next 2 and 9 are a factor pair, followed by 3 and 6. Then, I ask myself if 4 would be a factor. What about 5? Nope. So that brings me back to 6. I know that I have found all of the factor pairs because I have reached a repeating factor–6. Then I circle the greatest common factor of 2 and divide the numerator and denominator by 2.
 If a fraction is already simplified, the fraction rainbows will help show this, too. The only thing that will be different is that the largest common factor will be a 1. Dividing by 1 doesn’t change the numerator or denominator obviously so the fraction is already simplified.
I hope using fraction rainbows will help your students as well.
Congratulations!!
Congratulations to Malinda Quinn! She is the winner of the class Doorman contest. Yay, Malinda!!
Free Class Doorman!
Oh my gosh! I have just been introduced to a lifesaver! For you to understand the depth of my appreciation for the class Doorman, you will have to hear the whole story…

BANG…DA-DUM! My door has just been shut again by the custodian on one of many occasions because I left it open when I merely ran down the short hall to make a copy. I mean I was going to come right back, so why close the door? Then I would have to wrangle the key out of my pocket and open the door AGAIN wasting precious time. You see, we have an “energy guy” in the district who literally comes to our school at unannounced times to see if we have our doors shut (these are inside doors mind you). If our doors are not shut then our school is documented in some sort of way. I don’t know what happens to all this documentation, but nevertheless we are documented. We can also be documented for leaving our computers on. Even over Christmas break, we have gotten little notes that say you left the itty bitty light on your button’s monitor on… (whaaaaaaa???? me???? no never!!!) The little bitty button costs a total of .6 cents to leave on for the entire year–YES, 6 tenths of a cent.
Anyway, back to the Doorman—So, you see, when I was introduced to the Doorman, it meant I didn’t have to run to answer the door, I could just say “come in.” I could also run down the hallway to make a copy without unearthing the key out of my pocket–saving time. Like I said–LIFESAVER!
The Doorman is a flexible vinyl strip with velcro attached that wraps around a door handle. The other end of the Doorman loops around the handle so that the vinyl covers the latching part of the door as you can see below. This keeps the door from locking providing many less interruptions. I have tried this idea before with a piece of masking tape across the door latch but this has never worked because the tape isn’t ever strong enough to hold the latch in–plus you can’t take the tape off without a hassle. The Doorman works simply, and you can easily take it off when you need to latch the door. Then the Doorman just hangs on one of the knobs until you need it again. Mine blends in nicely with the door when I have it hanging since I have black paper all over my door. My Doorman is black, but they come in lots of other pretty colors, too.

Guess what? I’m teaming up with Jen from Teacheropolis to give one Doorman away for free! All you have to do is comment below with your favorite winter door decoration idea or link. The contest will close on Sunday, January 26th at midnight. I will pick a winner at random and announce them on Monday, January, 27th.
How Can Your Students Learn About Clock Fractions?
Oh, my gosh!! I have wanted to post about this forever, but when I taught the lesson, I didn’t think to take pictures. Well, here arose the opportunity when a 5th grade teacher wanted me to do this lesson with her class.
First it was all out WAR with the copy machine when I shrunk a larger clock face to smaller clocks to make this original. I wanted to have smaller faces so I could give them several and not waste paper. Plus I wanted to use colored paper. I shrunk the larger face to about 60% on the copier. Fifty percent was too small. I wanted the faces to be large enough for the kids to still be able to easily see the tiny marks around the sides of the clock.

I copied a class set of these on 3 different colors of paper.
First we discussed how many minutes were included in one hour on the clock face…Sixty of course. Then I had the kids tell me how many minutes were in half of a clock face or half an hour…too easy…30 minutes! Each time we found a fraction on the clock face, I had students label it with the fraction and with the amount of time.

Next, I asked them how many minutes were in a fourth of a clock face. To see what kids knew, I didn’t allow them to raise their hand or blurt out. I really wanted to know what each child thought. I had them write the minutes they thought were in a fourth on the back of the clock face and then cover it with their hand–so no cheating ;). This gave me a quick assessment of the class. Before students drew lines on the clock face for fourths, we discussed where to draw these lines so there were equal pieces. Fifteen minutes are in ¼ so students drew a line from the center to the 12,3,6, and 9. Then they snip, snip, snipped on the lines to make pull apart fraction pieces.

Now, for one that doesn’t work out quite so nicely–thirds. How can you split up 60minutes into 3 even sections?Hmmm…students gave me answers ranging from 10 to 60 when they did secret answers on the back of the pink clock face. I wrote down the ranges of answers that students gave me on the board. We weeded out the wrong answers as a class by justifying why the wrong answers couldn’t be right–this way the mathematical practices were involved. Several students, however, were easily able to tell me 20 minutes and reasoned that 3 sections of 20 minutes would be able to fit in the clock face. We discussed again where to cut the clock face so that the sections would be equal.

Below are all of the clock faces together….I LOVE, LOVE, LOVE colored paper

Then I started posing problems to the kids, so they could use their clock pieces as manipulatives. The picture below shows what the kids had on their desk when I asked them to show me how many minutes 2/4 of an hour was–EASY 30 minutes.

How many minutes is ¾ of an hour? Just look at the clock pieces to see how many. Below is a simple sheet I gave students to do as guided practice to make sure they were following along while we discussed their clock faces.

Yes, I do quick smileys (although usually with a pen) on every single one students get right as I walk around the room. I do this for two reasons. 1. It gives students a boost if I ask them to fix something. They don’t feel defeated because they got so many right and only a few were wrong. 2. This saves me time from grading papers later because I can tell which ones I have already checked.
To make students think outside the box, I also changed the size of the whole. For example, students had to find ⅔ of 45 minutes. This tripped up most students who were used to figuring out ⅔ of 60 minutes/the whole circle. Hmmm…if I think about 45 minutes in thirds, I can use three of the fourths pieces. Now these fourths pieces turn into thirds because three of them now make the whole of 45 minutes. If two of them are chosen then that makes ⅔.
Finally, students will tuck their fraction clock pieces away behind fraction notes in their journals for safe keeping. We taped envelopes down in journals for this. Most kids are able to do this on their own, however, some are not as self sufficient as one would hope in 5th grade.

A little more about this lesson… I gave each student a large white sheet with the three clocks (my original copy shown way above) for them to figure out other fractions of a clock such as twelfths or fifths. Students also did two word problems following the easy guided practice sheet. Those are not pictured. Here is the FractionClockConversions guided practice sheet shown above.
Updated 2-19-2016: Here are the detailed lessons for sale on TPT for $3. These include lesson plans, small printable clock faces, worksheet practice, and word problem practice.


Fill In Decimal Number Charts. Could This be the Answer?
Ok! So I won’t lie! I have struggled with the next teacher. Kids just fumble through decimals like there is a missing link. You try to have them do number lines, and they give you blank stares. You give them card sorts. They jumble all the cards up in the wrong order. They tell you the wrong answers almost always. There MUST be another way!! Well, 1 year later, I have finally put the pieces together.
Why can’t kids compare decimals? They are just numbers that follow a pattern with DOTS in them no less!
Have we ever stopped to look at the patterns that are formed when decimals are put in order. Have we stopped to reason about why the zeros drop off the ends of the numbers and they have the same value?
In kindergarten, first, and second grade, we have it somewhat figured out. For three years, students spend time counting and looking at patterns, and building numbers–for THREE YEARS. THEN BOOM! All of a sudden, they are supposed to draw their own conclusions about how to compare and round numbers that are abstract to them in 5th grade. So students CAN build decimals “reasoning about their size”, but where is the repetition that we give students in primary grades so that they can draw their own conclusions about the patterns. There is no counting standard that I can find…but maybe I just missed the standard or maybe I am just going on a rant here.
Anyway, I think students struggle with decimals, because we don’t give kids anything to hang their learning on…they have no foundation! I made some decimal number charts last year, but never really used them in depth. This year I made some fill in charts thinking this would solve the problem of students’ glassy eyed look when learning about decimals–AND NO…I’m not even talking about the kids on meds!! I really think that this is the problem…they need the foundation of counting before they can reason about decimals and move on to comparing, rounding, and ordering.
Because you are reading this, you obviously care about your students. You most likely wouldn’t be on the computer during your down time looking for materials for your kids. I am going to give you a few of the pages I made for FREE just because you care.
More charts are included than this single picture below.

I am also going to tell you about the pack of number charts I made that may help you even further. There are number charts for each section of decimal numbers counting by hundredths and thousandths. There is also a decimal number chart that counts by thousandths that is small enough to glue in students’ journals. Not only that, there are small number charts the same size as a base ten block that will help students put the concrete together with the abstract counting numbers as they place blocks on top of the charts. You can see a bit more below:


How Can You Motivate Your Class to Learn Math Facts?
This year, I have had the most competitive success when I have given attention to students progress on Reflex (an online math fact video game-like program for learning math facts–Read more about Reflex here). Each Friday, I pass out the reward certificates and recognize students who get a certificate at our morning meeting. Students who get a certificate also win a little prize with each certificate. What has helped the classes become most competitive is the bar graph I have hung in the hallway. Each class name is at the bottom of a bar. I update this graph nearly daily. Every time students go down the main hallway, they look to see if their class has grown on the graph. I have placed the graph below…

As you can see the taller bars are the 3rd-5th graders which have gotten VERY competitive. On our last contest 1st, 2nd, and 3rd place were only 1 point away from each other! I took a picture of the classes who won on the last contest to place beside the graph. I personally reward the 1st place classes with a party. This time I was so proud of the special ed class who won 1st place!
In addition to the above graph, one of our teachers has developed a class thermometer for her individual class competition out in the hallway. She moves each student’s name on a clothespin closer up the thermometer to 100% fluency each week.
I am not paid a dime to say this, but I must say Reflex math is the most effective tool I have ever used to teach math facts!
I must be honest. I hope the wall isn’t red underneath the paper at the end of the year. I think that every time I color on the paper to fill in the bars…the paper is kind of thin.


